Webhooks
Webhooks provide a powerful way to stay in the loop on what’s happening in your card program. We use webhooks to notify you when events occur so that you can take appropriate actions.
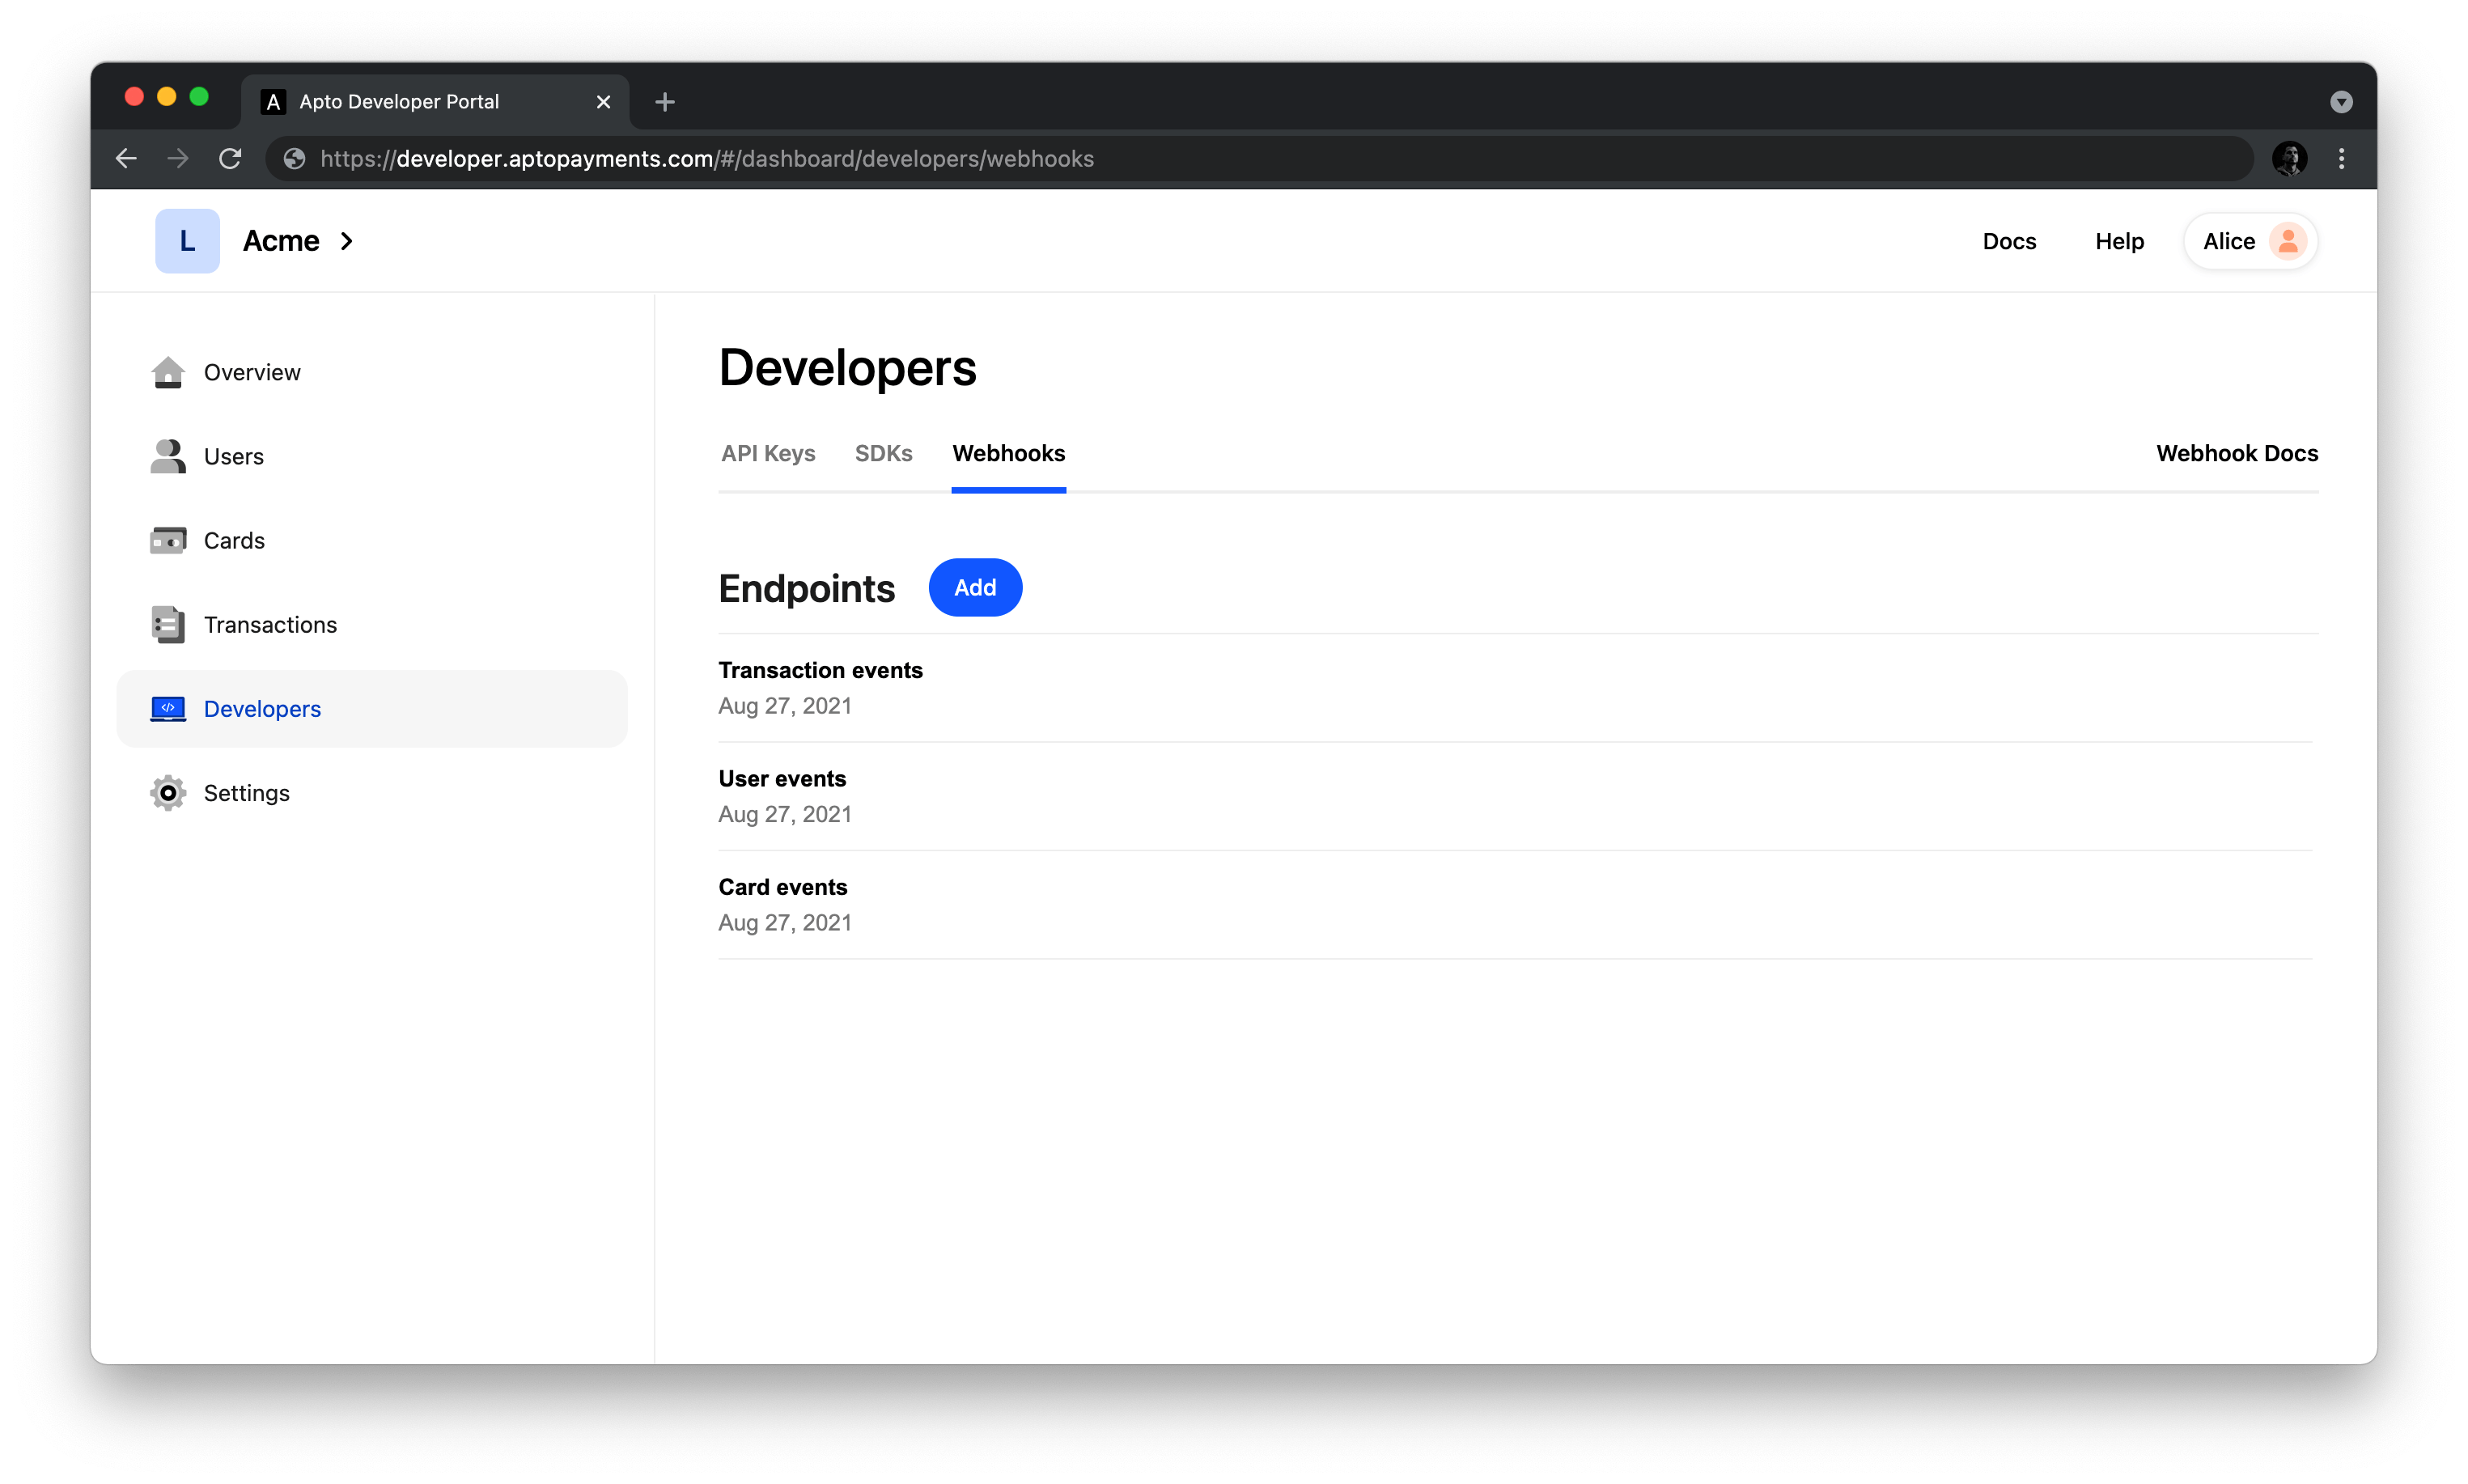
You can manage webhooks in the developer portal by navigating to Developers and then opening the Webhooks tab.
Apto has APIs, so why would you use webhooks? With an API, you initiate the request. You ask Apto to create, delete, update, or send you data. With a webhook, Apto initiates the events. When events happen in our system, we send data to you about those events.
Before you start using webhooks, decide which events you want to know about. Not every event is useful to every Apto customer. Listening for events that you don’t need can put an unnecessary load on your servers. See the list of available webhook events on the Developer Portal.
Here are some examples of how to map business actions to webhook events:
- Card Status - You may want to inform each cardholder when a card is on its way. To do that, you’d listen for the
card_sentevent to find out when a new card has been created and mailed out. - Transaction updates - If you are funding a cardholder's account yourself, you would credit or debit the account when a transaction amount has been updated. To do that, you’d listen for the
transaction_updateevent.
After identifying which events to listen for, you’ll create webhook endpoints on your server. These endpoints are where Apto sends the webhook event data so that you can take action.
Available webhook events
Apto supports the following events:
Card
| Event type | Event is sent when... |
|---|---|
| status_update | a card’s status is updated |
| pin_update | a card’s PIN is updated |
| card_sent | a card is reported as having been shipped |
| card_update | a card is updated, but the update is not accounted for by another webhook |
User
| Event type | Event is sent when... |
|---|---|
| kyc_update | a user’s kyc_status is updated |
| identity_update | a user’s identity details are updated, such as name, email address, or phone number |
| user_update | a user is updated, but the update is not accounted for by another webhook |
Transaction
| Event type | Event is sent when... |
|---|---|
| transaction_update | a transaction is updated |
Receiving webhooks
Creating a webhook endpoint on your server is no different from creating any page on your website. If you are using a Ruby framework such as Sinatra, you add a new route with the desired URL. If you’re using PHP, you create a new .php file on your server.
Apto makes an HTTP POST request to send the Event object to your endpoint URLs. Set up your webhook endpoints to receive and process JSON payloads. We deliver webhook data as JSON in the POST request body.
When you receive webhooks, you must acknowledge receipt.
Order of webhook events
Due to the asynchronous nature of webhooks, events may be sent out of the order they were generated. This behavior may be caused by retry attempts or temporary network errors. You can use the event id and created_at attributes to help manage duplicates and notifications coming in the wrong order.
Retry logic
When you receive an event, your endpoint must return a 2XX HTTP status code. It is important that you acknowledge the receipt of events prior to taking any action following their receipt in order to prevent timeouts. Any response codes outside of the 2XX HTTP range, such as 3XX codes, indicate that you did not receive the event.
If we do not receive a 2XX code, we will retry every two hours for up to 48 hours. After 24 attempts without receiving a 2XX status code, the event will fail.
Authenticating webhooks
Webhooks are sent using basic auth headers as the authentication scheme. When creating an endpoint, you will provide Apto with the basic auth username and password that we should use when sending you these events.
Event object
The Event object contains full event details, which you can use after parsing the JSON into an Event object.
Here are some of the included fields:
- The event
idis unique across all events. This value should be used to determine idempotency. If you see an event ID twice, Apto likely did not receive a 200 OK receipt for the original event. - The event
created_atvalue is the timestamp of when this event occurred. This value is important because events for the same object may potentially arrive out of order. - Each event has a
data_type, which is one ofcardholder,card, ortransaction. This is the API object stored in thedatafield. - Each event also has a
type. For the full list of event types, see available webhook events.
Webhook testing
Apto can keep logs of all the URLs that we ping, and provide these to you to reconcile against those received. To access this request history, please submit a request.
Please bear in mind that it is important to consider capacity planning when testing your webhooks, as there is the possibility that a significant number are sent which could overload your servers.
Working with webhooks
The developer dashboard lets you manage webhook subscriptions. You can subscribe to any of the provided Apto webhook events, and can provide different endpoints for each subscription. We can also send an event to more than one endpoint, if needed.
Adding a webhook
To add a webhook:
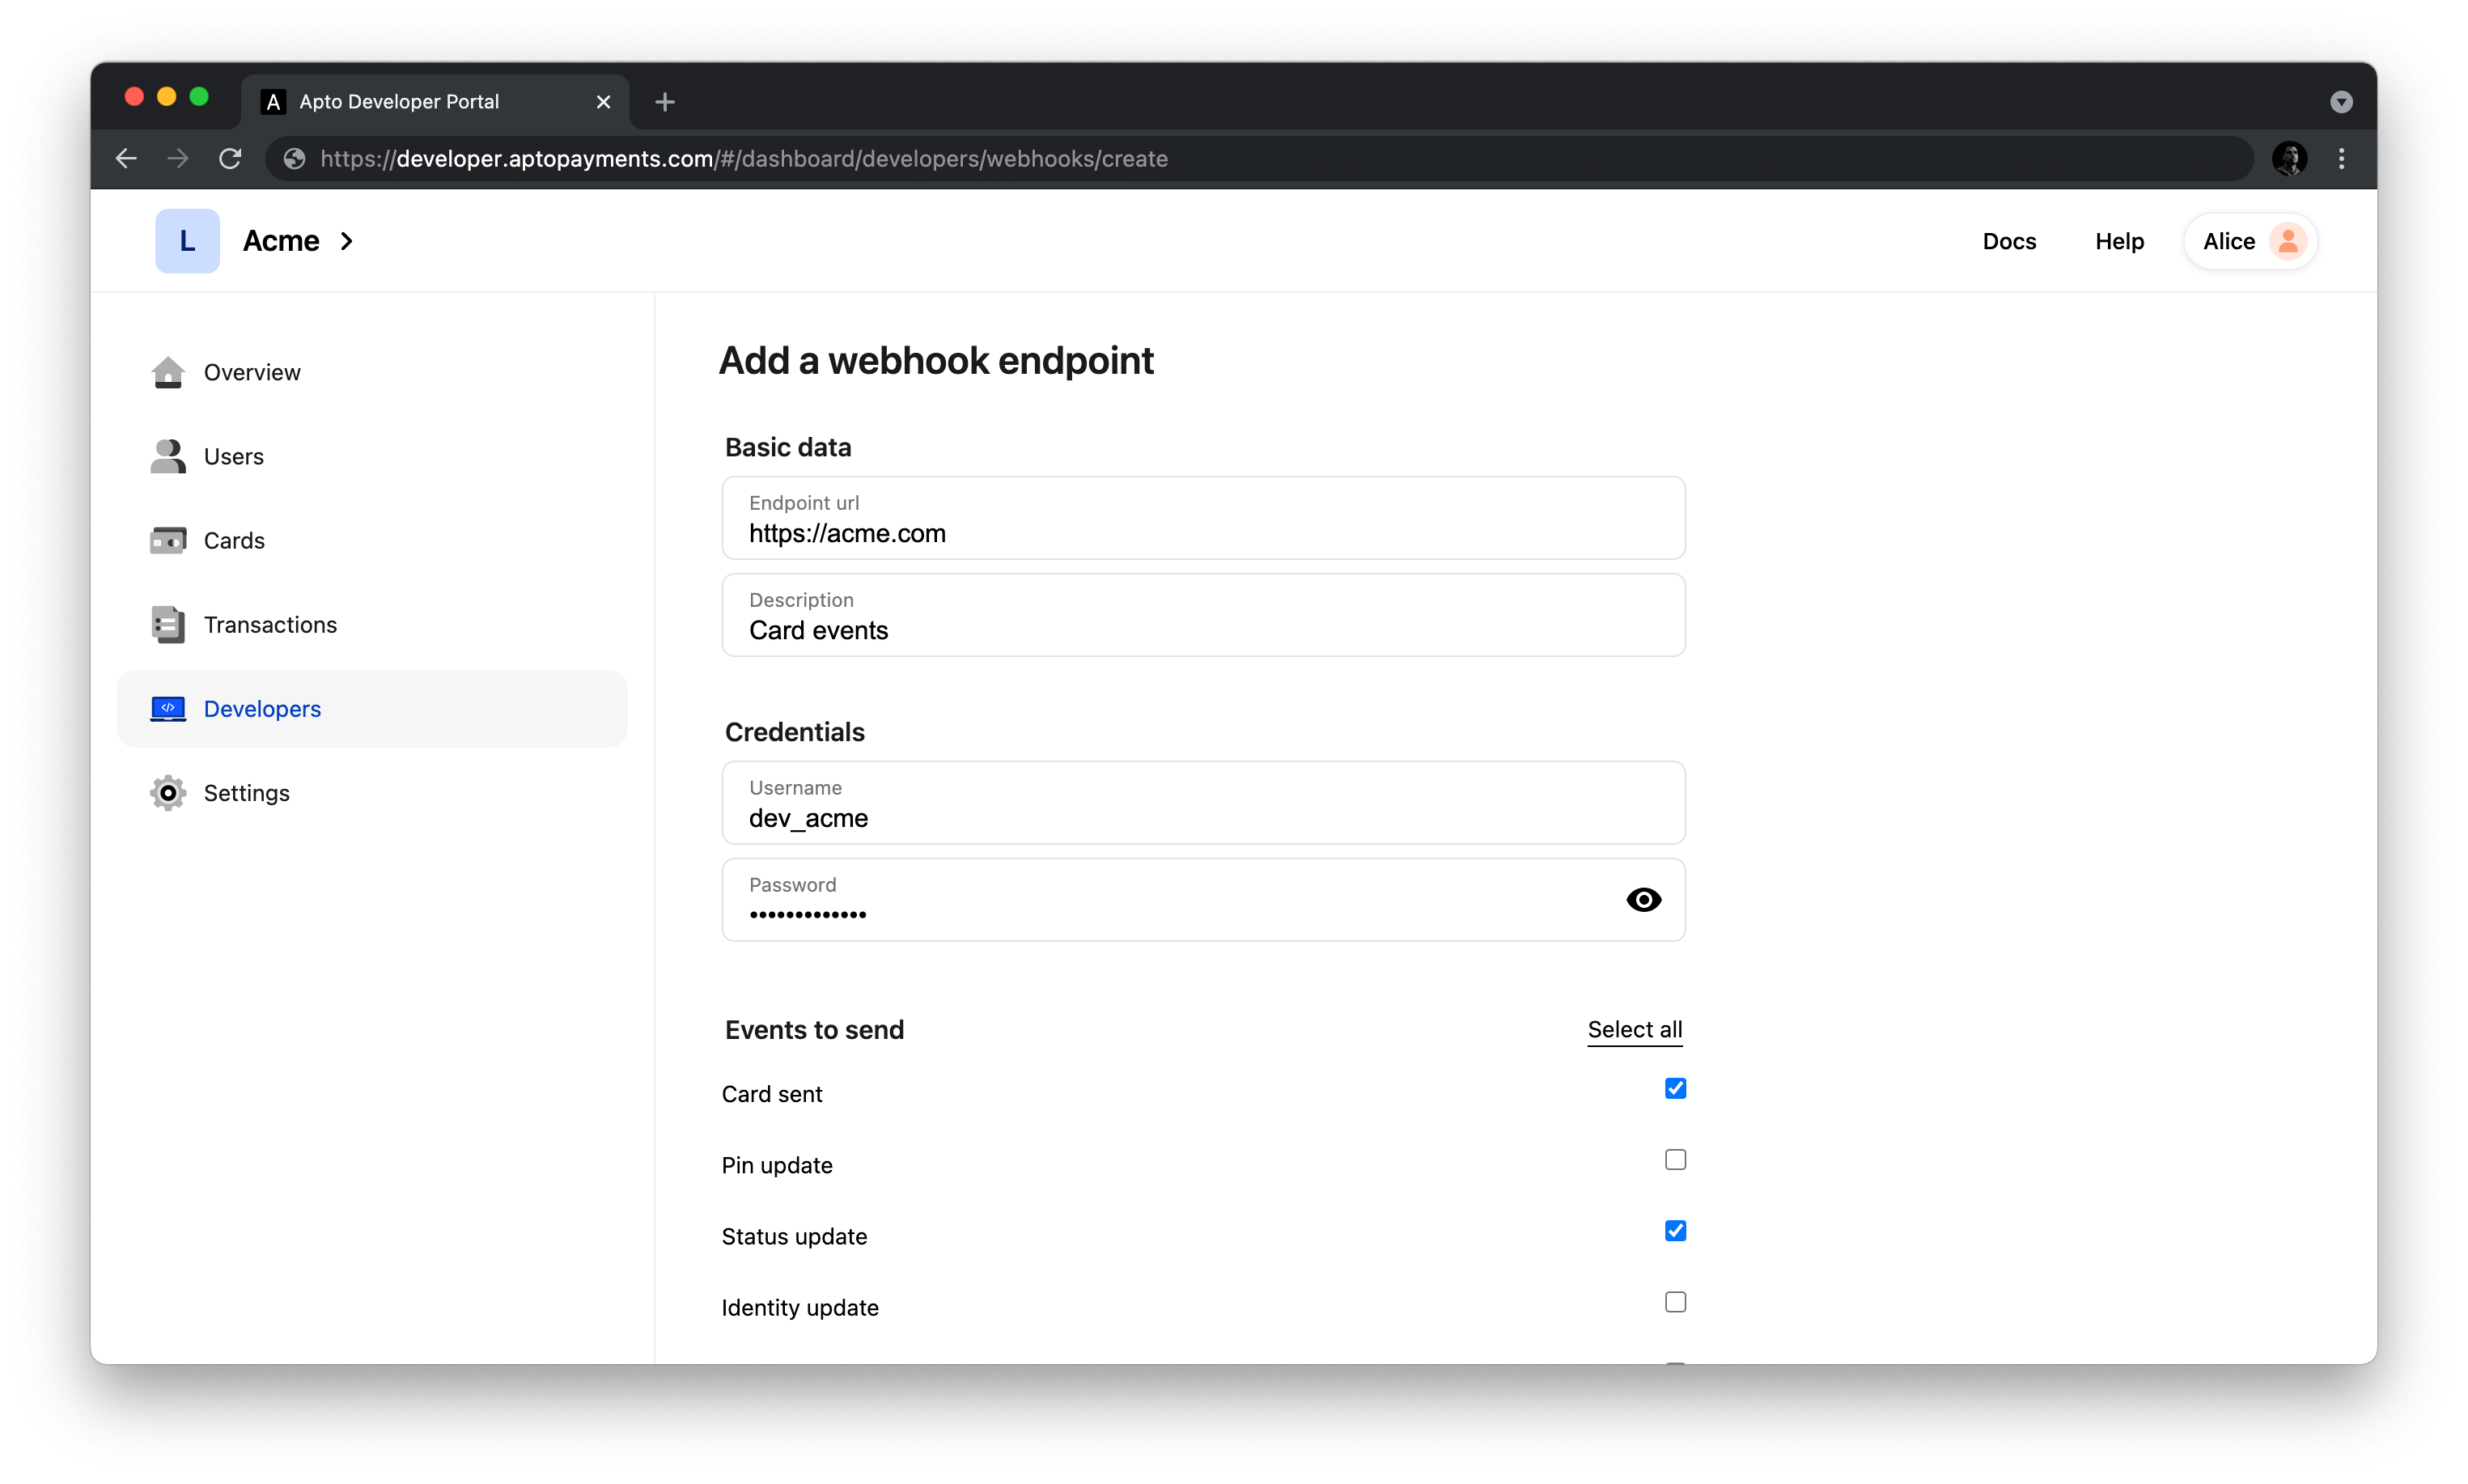
- Open the Apto developer dashboard, navigate to Developers, open the Webhooks tab, and select Add.
- Enter your endpoint URL. For more detail, see Receiving webhooks.
- (Optional) Enter a description for the webhook endpoint.
- Enter the credentials for your endpoint URL.
- Select one or more events for Apto to send, and select Add.
Webhooks created in Sandbox carry over to Production when you go live.
Deleting a webhook
To delete a webhook:
- Open the Apto developer dashboard, navigate to Developers, and open the Webhooks tab.
- Select a webhook, and then select Delete.