Mobile SDK

All card programs using APTO's SDKs or Mobile API are required to implement Signed Payloads. This is a mandatory update that must be completed to avoid program suspension. Please follow the Signed Payloads guide for more information, or contact programsupport@aptopayments.com with any questions.
Welcome to the Apto iOS Mobile SDK. This SDK provides access to Apto's mobile API, and is designed to be used for mobile apps. When using this SDK, there is no need for a separate API integration. All of the API endpoints are exposed as simple-to-use SDK methods and encapsulate the data returned by the underlying API.
Note: This SDK can be used in conjunction with our UI SDK. However, if you would like to control your UI/UX, we recommend using the standalone Mobile SDK and implementing your own UI/UX.
With this SDK, you can:
- Onboard new users
- Issue new cards
- Obtain card activity information
- Manage cards (set pin, lock / unlock, etc.)
Note: The Apto Mobile API has a request rate limit of 1 request per 30 seconds for the verification and login endpoints.
This document provides an overview of how to:
- Install the SDK
- Initialize the SDK
- Signed Payloads
- Verify a User Credential to Obtain a User Token
- Authenticate a User
- Manage Users
- Manage Card Programs
- Manage Cards
- View Card Transactions and Spending
- Manage Card Payment Sources / Load Funds
- Manage Card Funding Sources for On-demand Debits (Blue or Orange Programs only)
- Set Notification Preferences
- In-App Provisioning
- P2P Payments
Note: To enable your cardholders to view PCI Data, you will also need to use our PCI SDK.
You can access the iOS Mobile SDK on GitHub.
To contribute to the SDK development, see Contributions & Development
Requirements
- iOS 12.0 (minimum version)
- Swift 5 (minimum version)
- CocoaPods. No minimum version is required, but version 1.8.3 or higher is recommended.
Get the Mobile API key
A Mobile API Key is required to run the SDK. To retrieve your Mobile API Key see Get the Mobile API Key for the SDKs.
Install the SDK
We suggest using CocoaPods to install the SDK.
In your project's
Podfile:At the top of the document, ensure the platform specified is set to iOS 12 and frameworks are enabled:
platform :ios, '12.0'

...

use_frameworks!
Add the Apto iOS SDK pod dependency:
    pod 'AptoSDK'
    ```
Open your Terminal app, and navigate to your project's folder containing the
Podfileusingcdand install the SDK by running thepod installcommandcd PATH_TO_PROJECT_FOLDER
pod installUse the
.xcworkspacefile to open and run your project.
Note: This Xcode workspace is required for your project to find the CocoaPods libraries.
Initialize the SDK
Follow the steps below to initialize the SDK:
- Import AptoSDK into your source code file:
import AptoSDK
- Invoke the
initializeWithApiKeySDK method and pass in theMOBILE_API_KEYfrom the Apto Developer Portal. This fully initializes the SDK for your application.
AptoPlatform.defaultManager().initializeWithApiKey("MOBILE_API_KEY")
Note: By default, the SDK is initialized for the production environment.
To use the SDK in sandbox mode, append the environment parameter during initialization and set the environment to .sandbox:
AptoPlatform.defaultManager().initializeWithApiKey("MOBILE_API_KEY", environment: .sandbox)
Signed Payloads
Once you have finished setting up your server, as outlined in the Signed Payloads guide, you will need to create an AptoPlatformWebTokenProvider that fetches the JWT token from that server.
class MyWebTokenProvider : AptoPlatformWebTokenProvider {

  public func getToken(_ payload: [String: Any], callback: @escaping (Result<String, NSError>) -> ()) {

    var req = URLRequest(url: "http://localhost/sign")
    req.method = .post
    req.headers = ["Content-Type": "application/json", "Accept": "application/json"];

    do {
       req.httpBody = try JSONSerialization.data(withJSONObject: payload)
    } catch {
       print("HTTP Request Failed \(error)")
       // let SDK know an error happened
       callback(.failure(WebTokenError()))
    }

    let task = URLSession.shared.dataTask(with: req) { data, response, error in
        do {
            if let data = data {
                let result: JWTToken = try JSONDecoder().decode(JWTToken.self, from: data)
                // send the JWT back to the SDK
                callback(.success(result.token))
            } else if let error = error {
                print("HTTP Request returned bad data \(error)")
                // let SDK know an error happened
                callback(.failure(WebTokenError()))
            }
        } catch {
            print("HTTP Request Failed \(error)")
            // let SDK know an error happened
            callback(.failure(WebTokenError()))
        }
    }

    task.resume()

  }
}
You will then need to set the WebTokenProvider at the same time you initialize the SDK. This class will be called anytime a signed payload is needed.
AptoPlatform.defaultManager().webTokenProvider = MyWebTokenProvider()
Verify a User Credential to Obtain a User Token
The SDK enables users to sign up or sign in to the Apto Mobile API.
A user's credentials must be verified prior to authenticating a user. A successful verification will return a user token, which is used during the authentication process. Depending on your project's configuration, the user's credentials can be:
Primary credential: The user's phone number or email address. Green Program is the default program, that uses a phone number as the primary credential. Only Blue or Orange Programs can use an email address as the primary credential, and this must be configured by Apto Payments. Please contact us if you would like to use a different primary credential.
Note: The system associated with the primary credential must be capable of receiving a secret One-Time Passcode (OTP) code that is used to verify the user's primary credential. For example, the phone number must be able to receive an SMS message, and the email address must be able to receive an email sent by Apto Payments.
Secondary credential: The default is the user's date of birth.
There are three main methods for the User Verification Process:
- Start a New Verification - Use this to initialize the verification process.
- Complete a Verification - Use this to finish the verification process.
- Restart a Primary Verification - This only applies to primary (phone / email) verifications. Use this to conduct subsequent verifications, should the initial verification fail.
User Verification Process
Start verification for the user's primary credential. See Start a New Verification for more information.
Complete verification for the user's primary credential. See Complete a Verification for more information.
Determine if the user is a new or existing user. Once the user's primary credential is verified, the API response will contain data indicating if the credential belongs to an existing user or a new user.
If the credentials belong to an existing user:
- Verify the user's secondary credential. See Complete a Verification for more information.
- Use the SDK's login method to obtain a user session token. The login method consumes the two previous verifications, and the SDK automatically stores and manages the user token. See Log in with an Existing User for more information.
If the credentials don't belong to an existing user:
- Create a new user with the verified credentials and obtain a user token. The SDK automatically stores and manages the user token.
When testing your program in Sandbox, you'll only be able to create users with U.S. phone numbers. If you're a customer of one of our Blue or Orange Programs and would like to use non-U.S. phone numbers to test cardholder operations, contact us at support@aptopayments.com
Start a New Verification
Depending on your project's configuration for your users, use one of the following SDK methods to start a new verification. Green Program can only use the phone verification.
- Phone Verification:
AptoPlatform.startPhoneVerification - Email Verification:
AptoPlatform.startEmailVerification
Phone Verification
The phone number used for a phone verification must be capable of receiving an SMS.
To initialize a user verification with a phone number:
Initialize a
PhoneNumberobject, passing in the user's country code and phone number as strings:Note:
- The country code for the United States is
1. - The
PHONE_NUMBERvalue should only contain numerical values.
- The country code for the United States is
let phoneNumber = PhoneNumber("COUNTRY_CODE", "PHONE_NUMBER")
- Pass the
phoneNumberobject into thestartPhoneVerificationmethod to start the phone verification:
AptoPlatform.defaultManager().startPhoneVerification(phoneNumber) { result in
  switch result {
  case .failure(let error):
    // Do something with the error
  case .success(let verification):
    // The verification started and the user received an SMS with a single use code (OTP).
  }
}
- When the method succeeds, a
verificationobject is included in the callback:- The user will receive a single use code (OTP) via SMS. Use that code and the returned
verificationobject to complete verification for the user's primary credential. - (Optional) Add verification handling within the success callback.
- The user will receive a single use code (OTP) via SMS. Use that code and the returned
- When the method fails, error handling can be performed using the
errorresponse. Errors can include an incorrect OTP code submission or connection problems to the API.
Email Verification
Email verification is only available for Blue or Orange Programs. To set the primary credential to use the user's email address, please contact us.
To initialize a user verification with an email address, use the startEmailVerification method and pass in the user's email as a string:
- Create an
Emailobject with the user's email address:
let email = Email(email: "user@gmail.com", verified: nil, notSpecified: nil)
- Pass the
emailobject into thestartEmailVerificationmethod to start the email verification:
AptoPlatform.defaultManager().startEmailVerification(email) { result in
  switch result {
  case .failure(let error):
    // Do something with the error
  case .success(let verification):
    // The verification started and the user received an email with a single use code.
  }
}
- When the method succeeds, a
verificationobject is included in the callback:- The user will receive a single use code (OTP) via email. Use that code and the
verificationobject to complete verification for the user's primary credential. - (Optional) Add verification handling within the success callback.
- The user will receive a single use code (OTP) via email. Use that code and the
- When the method fails, error handling can be performed using the
errorresponse. Errors can include an incorrect OTP code submission or connection problems to the API.
Complete a Verification
To complete a verification, the user will need to enter their SMS / email code or date of birth, depending on the type of verification.
Note: If this is the completion of a secondary verification, ensure you use the primary verification's secondaryCredential value as the verification object for this method.
Set the
secretproperty on theverificationobject:Note: For verifying phone numbers and email addresses when testing in the sandbox environment, you must use
000000as the OTP code.- If verifying a phone number, replace
OTP_CODE_OR_BIRTHDATEwith the OTP code received via SMS from the Start a New Verification process. Note: Use only numerical values. - If verifying an email address, replace
OTP_CODE_OR_BIRTHDATEwith the OTP code received via email from the Start a New Verification process. Note: Use only numerical values. - If verifying a date of birth, replace
OTP_CODE_OR_BIRTHDATEwith the user's date of birth, using the formatYYYY-MM-DD. For example,1999-01-01.
- If verifying a phone number, replace
verification.secret = "OTP_CODE_OR_BIRTHDATE"
- Complete the verification by passing the
verificationobject into thecompleteVerificationmethod.
AptoPlatform.defaultManager().completeVerification(verification) { result in
  switch result {
  case .failure(let error):
    // Do something with the error
  case .success(let verification):
    if verification.status == .passed {
      // The verification succeeded. If it belongs to an existing user, it will contain a non null `secondaryCredential`.
    }
    else {
      // The verification failed: the secret is invalid.
    }
  }
}
- When the method succeeds, a
Verificationobject is included in the callback:- If the verification's
statusproperty is set toVerificationStatus.PASSED, the verification is successful.- For primary verifications, if the verification belongs to an existing user, the response will contain a non-null
secondaryCredentialvalue. Use thesecondaryCredentialvalue to complete verification for the user's secondary credential. - For secondary verifications, the user is now fully verified and log in can proceed.
- For primary verifications, if the verification belongs to an existing user, the response will contain a non-null
- Otherwise, the verification failed due to an invalid
secretvalue. If this is primary verification, you can add error handling and restart the primary verification for the user to re-enter their OTP code.
- If the verification's
- When the method fails, error handling can be included within the
errorresponse.
Restart a Verification
If you previously initialized a phone or email verification, you can restart a verification by passing in the primary verification object into the restartVerification method:
AptoPlatform.defaultManager().restartVerification(verification) { result in
  switch result {
  case .failure(let error):
    // Do something with the error
  case .success(let verification):
    // The verification restarted and the user received a new secret via email or phone.
  }
}
- When the method succeeds, a
verificationobject is included in the callback:- The user will receive a single-use code (OTP) via SMS or email (depending on the type of verification). Use that code and the returned
verificationobject to complete verification for the user's primary credential. - (Optional) Add verification handling within the success callback.
- The user will receive a single-use code (OTP) via SMS or email (depending on the type of verification). Use that code and the returned
- When the method fails, error handling can be included within the
errorresponse.
Authenticate a User
A user session token is required for authentication. A session token is generated once you successfully sign up a new user or log a user into the SDK. The session token is valid until:
The user is logged out of the SDK.
A timeout occurs (i.e., the user doesn't interact with the app for one year in production mode or one month in sandbox mode).
Note: The session length may be configured to a custom duration. Contact us if you'd like to customize the session length.
For the Green Program the session token is created by the SDK after verifying the user.
Blue or Orange Programs, have access to our Core API which enables you to leverage an existing session token for a user. Use the setUserToken method and replace USER_TOKEN with your existing user token. This enables the user to bypass the requirement to enter an OTP code they receive via SMS or email.
Note: Ensure your user token is passed in as a string.
AptoPlatform.defaultManager().setUserToken("USER_TOKEN")
Note: This is optional. If a session token is not provided, the SDK will obtain one by verifying the user.
Manage Users
The SDK enables you to:
Create a New User
A user's primary credential must be verified prior to creating a new user. Once the primary credential verification is complete, if a user already exists, a new user can not be created. See the User Verification Process for more information.
Once a user's primary credential is verified and a new user can be created, use the createUser method to create a new user.
Create a primary credential object and set its
verificationobject.This example, creates a
PhoneNumberobject for project configurations that use a phone number as the primary credential.
// Prepare a DataPointList containing the verified user's primary credential.
let primaryCredential = PhoneNumber(countryCode, phoneNumber)
primaryCredential.verification = verification // The verification obtained before.
Create a
DataPointListobject and add the following information:- Verified primary credential object
- Phone Number Note: The
PhoneNumberobject requires a numerical country code and numerical phone number passed in as strings. - First and last name
- Address
- Date Of Birth
- (Optional) Any additional
DataPoint.Typeenum data.
let userData = DataPointList()
userData.add(primaryCredential)

let phoneNumber = PhoneNumber("1", "1234567890")
let phone = PhoneDataPoint()
userData.add(phone)

let email = EmailDataPoint("user@gmail.com")
userData.add(email)

let name = NameDataPoint(firstName = "Jane", lastname = "Smith")
userData.add(name)

let address = AddressDataPoint(streetOne = "123 Main Street", locality = "San Francisco", region = "CA", postalCode = "94103", country = "US")
userData.add(address)

let birthdate = BirthDataPoint(LocalDate.of(year = 1963, month = 1, dayOfMonth: 31 ))
userData.add(birthdate)
- Pass the
userDataobject into thecreateUsermethod to create a new user.
AptoPlatform.defaultManager().createUser(userData: userData) { result in
  switch result {
  case .failure(let error):
    // Do something with the error
  case .success(let user):
    // The user created. It contains the user id and the user session token.
  }
}
- When the method succeeds, a
Userobject is returned containing the user ID and user session token. - When the method fails, error handling can be included within the
errorresponse.
Note: The createUser method can accept the following optional parameters:
custodianUid- Use this parameter to send Apto the user's ID for inclusion in future webhook notifications. This simplifies the process of matching the user with the notification event.metadata- Use this parameter to send Apto metadata about the new user (maximum 256 characters).
let custodianUid = "your_platform_user_id"

AptoPlatform.defaultManager().createUser(userData: userPII, custodianUid: custodianUid, metadata: "My data") { result in
  switch result {
  case .failure(let error):
    // Do something with the error
  case .success(let user):
    // The user created. It contains the user id and the user session token.
  }
}
Log in with an Existing User
Once the primary and secondary credentials are verified, log the user in with the loginUserWith method and obtain a user token for the existing user.
Note: Ensure you pass in the successful verifications for your primary primaryVerification and secondary secondaryVerification verifications.
AptoPlatform.defaultManager().loginUserWith(verifications: [primaryVerification, secondaryVerification]) { result in
  switch result {
  case .failure(let error):
    // Do something with the error
  case .success(let user):
    // The user logged in. The user variable contains the user id and the user session token.
  }
}
- When the method succeeds, the
userobject contains the user ID and user session token. - When the method fails, error handling can be included within the
errorresponse.
Update a User's Info
You can update the user's information using the updateUserInfo method:
- Create a
DataPointListobject:
let userPII = DataPointList()
- Create
DataPointobjects for the data you want to update and add it touserPII.
let address = Address(address:"123 Main Street", apUnit: nil, country: Country.defaultCountry, city: "San Francisco", region: "CA", zip: "12345")

userPII.add(address)

val name = PersonalName(firstName: "John", lastName: "Doe")

userPII.add(name)
The available list of DataPoint objects are:
DataPoint | Description |
|---|---|
Address | Address information for the update. |
PersonalName | User's first and last name for the update. |
PhoneNumber | Phone's country code and number for the update. |
Email | Email address for the update. |
BirthDate | User's date of birth for the update. |
IdDocument | User's ID verification document for the update. |
- Pass the
userDatainto theupdateUserInfomethod:
// Add to userPII the datapoints that you want to update
AptoPlatform.defaultManager().updateUserInfo(userPII) { result in
  switch result {
  case .failure(let error):
    // Do something with the error
  case .success(let user):
    // Update successful
  }
}
- When the method succeeds, the update is successful and a
Userobject is returned containing the updated user information. - When the method fails, error handling can be included within the
errorresponse.
Close a User Session
When a session is closed, it will log the user out of all sessions on all devices.
To close the current user's session, use the logout SDK method:
AptoPlatform.defaultManager().logout()
Note: If the user closes the app without invoking the logout method (i.e., the user switches to another app, manually closes the app, etc.), the user's session will still be active.
Manage Card Programs
The SDK enables you to manage card programs. This section explains how to use the SDK to:
Note: Card Programs used to be called Card Products, so you may see the SDK methods reflect the term products. These method names may change in the future to match the correct term programs.
Get Available Card Programs
To retrieve a list of all the available card programs, use the fetchCardProducts method:
AptoPlatform.defaultManager().fetchCardProducts() { result in
  switch result {
  case .failure(let error):
    // Do something with the error
  case .success(let cardProductSummary):
    // cardProductSummary is a CardProductSummary object
  }
}
- When the method succeeds, a list of
CardProductSummaryobjects are returned, containing details for each card program. - When the method fails, error handling can be included within the
errorresponse.
Get Card Program Details
To retrieve a specific card program, pass a card program ID into the fetchCardProduct method:
forceRefresh is a boolean value indicating if transactions should be retrieved from the Apto Mobile API or the local cached transaction list. If set to true, transactions are retrieved from the Apto Mobile API.
AptoPlatform.defaultManager().fetchCardProduct(cardProductId: cardProductId, forceRefresh: false) { result in
  switch result {
  case .failure(let error):
    // Do something with the error
  case .success(let cardProduct):
    // cardProduct is a CardProduct object
  }
}
- When the method succeeds, a
CardProductobject is returned containing details for the card program. - When the method fails, error handling can be included within the
errorresponse.
Manage Cards
The SDK enables you to manage cards. This feature is only available for Blue or Orange Programs.
Note: Green Program only support one card per user.
This section explains how to use the SDK to:
- Get the List of Cards for the User
- Retrieve a Card by ID
- Change a Card PIN
- Lock / Unlock a Card
- Issue a New Card
- Order a Physical Card
- Activate a Physical Card
Get the List of Cards for the User
To retrieve a list of cards for the current user, pass the following into the fetchCards method:
pagination: APaginationQueryobject that represents the details of a pagination. Optional.
| Property | Type | Description |
|---|---|---|
limit | Int | This value specifies the upper limit of the number of payment sources returned per call. The maximum value for this parameter is 50. |
startingAfter | String | If this value is set, only payment source ID's larger than this value are returned. |
endingBefore | String | If this value is set, only payment source ID's less than this value are returned. |
Note: The startingAfter and endingBefore parameters are mutually exclusive. Only one of these parameters may be present per call. If both parameters are set, an error will be thrown.
AptoPlatform.defaultManager().fetchCards(pagination: pagination) { result in
  switch result {
  case .failure(let error):
    // Do something with the error
  case .success(let paginatedCards):
    // paginatedCards contain an array of PaginatedCard objects
    let nonClosedCards = paginatedCards.list.filter { $0.state != .cancelled }
    .....
  }
}
- When the method succeeds, a
ListWithPagination<Card>object is returned. The object contains the list ofCardobjects and the details of the pagination:page,rows,hasMore,totalCount. TheCardobjects can be accessed directly on thepaginatedCardsobject, by accessing thelistproperty. - When the method fails, error handling can be included within the
errorresponse.
Retrieve a Card by ID
To retrieve a specific card program, pass a card ID into the fetchCard method:
cardId- A string representing the ID of the card you want to retrieve.forceRefresh- A boolean value which forces data to be returned from an API call rather than the local cache.retrieveBalances- A boolean value indicating if the card balance should be returned in the response.
AptoPlatform.defaultManager().fetchCard(cardId, forceRefresh: false, retrieveBalances: false) { result in
  switch result {
  case .failure(let error):
    // Do something with the error
  case .success(let card):
    // card is a Card object
  }
}
- When the method succeeds, a
Cardobject is returned containing details for the card. - When the method fails, error handling can be included within the
errorresponse.
Change a Card PIN
If your app enables users to change their card PIN, we recommend asking the user to confirm their current PIN prior to entering and confirming a new PIN.
To set or change the card PIN, use the changeCardPin method and pass in the following:
accountID- ThecardProductIdof theCardobject you want to change.pin- A four-digit PIN passed in as a string.
AptoPlatform.defaultManager().changeCardPIN(accountId, pin: "1234") { result in
  switch result {
  case .failure(let error):
    // Do something with the error
  case .success(let card):
    // Operation successful
  }
}
Note: The returned Card object will not contain the PIN property.
- When the method succeeds, a
cardobject is returned containing information about the updated card. - When the method fails, error handling can be included within the
errorresponse.
Lock / Unlock a Card
You can enable users to lock and unlock their cards.
Transactions using a locked card will be rejected by the merchant's POS, and therefore we recommend to lock cards only if a user makes an explicit request to lock their card.
Lock a Card
To lock a card, pass the card's accountID into the lockCard method:
AptoPlatform.defaultManager().lockCard(accountId) { result in
  switch result {
  case .failure(let error):
    // Do something with the error
  case .success(let card):
    // Operation successful
  }
}
- When the method succeeds:
- A
Cardobject is returned containing information about the locked card, and the card'sstateproperty will be listed as.inactive. - The registered user will receive an email confirmation that the card has been deactivated.
- A
- When the method fails, error handling can be included within the
errorresponse.
Unlock a Card
To unlock a card, pass the card's accountID into the unlockCard method:
AptoPlatform.defaultManager().unlockCard(accountId) { result in
  switch result {
  case .failure(let error):
    // Do something with the error
  case .success(let card):
    // Operation successful
  }
}
- When the method succeeds, a
Cardobject is returned containing information about the unlocked card, and the card'sstateproperty will be listed as.active. Note: Unlike thelockmethod, the registered user will NOT receive an email confirmation that the card has been activated. - When the method fails, error handling can be included within the
errorresponse.
Issue a New Card
Once a user is created, you can issue a card for the user.
The steps to issue a card are:
Get Card Programs
Each card must be issued under a card program.
To retrieve a list of all the available card programs, use the fetchCardProducts method:
AptoPlatform.defaultManager().fetchCardProducts() { result in
  switch result {
  case .failure(let error):
    // Do something with the error
  case .success(let cardProductSummary):
    // cardProductSummary is a CardProductSummary object
  }
}
Note: Card Programs used to be called Card Products, so you may see the SDK methods reflect the term products. These method names may change in the future to match the correct term programs.
- When the method succeeds, a list of
CardProductSummaryobjects are returned, containing details for each card program. Save the card program's ID you want to use to apply for a new card. - When the method fails, error handling can be included within the
errorresponse.
Apply for a Card
Use the card program's ID from the previous step to apply for a card.
To apply for a card:
- Create a
CardProductobject passing in thecardProductId:
let cardProduct = CardProduct(cardProductId)
- Pass
cardProductinto theapplyToCardSDK method:
AptoPlatform.defaultManager().applyToCard(cardProduct) { result in
  switch result {
  case .failure(let error):
    // Do something with the error
  case .success(let cardApplication):
    // In this step we have successfully applied for a card.
    // Check the cardApplication.nextAction property to identify the next step of the application
  }
}
- When the method succeeds, a
CardApplicationobject is returned, containing details for the card application. Save thecardApplicationobject for the remaining steps of the application. - When the method fails, error handling can be included within the
errorresponse.
Get the Next Application Step
Once you have a card application initiated, check for the next application step in the nextAction property.
Note: Prior to checking for the next application step, ensure you update the card application status using the fetchCardApplicationStatus() method. For example:
AptoPlatform.defaultManager().fetchCardApplicationStatus(cardApplication.id) { result in
  switch result {
  case .failure(let error):
    // Do something with the error
  case .success(let updatedCardApplication):
    // Check for the next step.
    if (updatedCardApplication.nextAction is WorkflowActionType.SHOW_DISCLAIMER) {
      // Show the disclaimer
    }
  }
}
The cardApplication.nextAction is a WorkflowActionType value. The available WorkflowActionType values are:
| Value | Description |
|---|---|
COLLECT_USER_DATA | If any required user information is missing, the next action value will be COLLECT_USER_DATA. |
SELECT_BALANCE_STORE | For Blue or Orange Programs, if using an OAuth application process and all required user information was submitted during user creation, this is the default step. See Set the Balance Store using OAuth (Blue or Orange only) to process this step. |
SHOW_DISCLAIMER | For all programs, if all required user information was submitted during user creation, this is the default step prior to issuing a card. See Accept the Disclaimer to process this step. |
ISSUE_CARD | Indicates the application is complete and a card can be issued for the user. See Issue the Card to issue a card for the user. |
UNSUPPORTED_ACTION_TYPE | This indicates the next step is not currently supported. |
Set the Balance Store using OAuth (Blue or Orange Programs only)
To set the balance store using OAuth:
- Get the allowed balance type from the
nextAction'sactionConfiguration.allowedBalanceTypes.first()property.
let allowedBalanceType = cardApplication.nextAction.actionConfiguration.allowedBalanceTypes.first()
- Pass the allowed balance type into the
startOauthAuthenticationmethod:
AptoPlatform.defaultManager().startOauthAuthentication(allowedBalanceType) { result in
  switch result {
  case .failure(let error):
    // Do something with the error
  case .success(let oauthAttempt):
            let url = oauthAttempt.url
           // Start the oauth attempt in a separate screen
  }
}
- When the method succeeds, an OAuth attempt object will be returned. Save its
urlproperty for the next OAuth process. - When the method fails, error handling can be included within the
errorresponse.
- Load the OAuth-attempt URL in a web view.
Note: Your OAuth server must call the Apto OAuth callback endpoint /v1/oauth/callback adhering to OAuth2 standards, including passing in the token and secret, or the error message (if any).
- Once the user completes the OAuth process, the user will be redirected to the
apto-sdk://oauth-finishURL. Use this to check for the OAuth status.
AptoPlatform.defaultManager().verifyOauthAttemptStatus(oauthAttempt) { result in
  switch result {
  case .failure(let error):
    // Do something with the error
  case .success(let oauthAttempt):
        // Verify that the state is PASSED
        if (oauthAttempt.state == "PASSED") {
          // The OAuth attempt is successful
        } else {
          // The OAuth attempt failed
        }
    }
  }
}
The available values for the OAuth state are PASSED or FAILED:
- If the OAuth
stateisPASSED, proceed to the next step to set the balance store using the returned OAuth token ID. - If the OAuth
stateisFAILED, the user must restart the OAuth process to retrieve an OAuth token ID.
- Once the OAuth completes successfully, pass the card application ID and OAuth token ID into the
setBalanceStoremethod:
AptoPlatform.defaultManager().setBalanceStore(cardApplication.id, oauthAttempt.tokenId) { result in
  switch result {
  case .failure(let error):
    // Do something with the error
  case .success(let selectBalanceStoreResult):
    // selectBalanceStoreResult.result should be VALID
  }
}
- When the method succeeds, a select balance store result object is returned. Ensure the
resultproperty isVALIDbefore proceeding to the next step. - When the method fails, error handling can be included within the
errorresponse.
- Check the application status by passing the card application ID into the
fetchCardApplicationStatusmethod:
AptoPlatform.defaultManager().fetchCardApplicationStatus(cardApplication.id) { result in
  switch result {
  case .failure(let error):
    // Do something with the error
  case .success(let updatedCardApplication):
    // Check the next step. After the balance store the result should be SHOW_DISCLAIMER
    if (updatedCardApplication.nextAction is WorkflowActionType.SHOW_DISCLAIMER) {
      // Show the disclaimer
    }
  }
}
- When the method succeeds, check the application's
nextActionproperty. The value should beSHOW_DISCLAIMERto indicate the next step in the application is to display the disclaimer. See Accept the Disclaimer to process this step. - When the method fails, error handling can be included within the
errorresponse.
Accept the Disclaimer
The user must accept the disclaimer to complete their card application. To process the user's disclaimer acceptance:
Display the disclaimer to the user and ask for their acceptance.
Once the user confirms they accept the disclaimer, pass the application's
workflowObjectIdandnextActionproperties into theacceptDisclaimermethod to mark the disclaimer as accepted:
AptoPlatform.defaultManager().acceptDisclaimer(cardApplication.workflowObjectId, cardApplication.nextAction) { result in
  switch result {
  case .failure(let error):
    // Do something with the error
  case .success(let success):
    // disclaimer has been accepted
  }
}
- When the method succeeds, the disclaimer has been successfully processed.
- When the method fails, error handling can be included within the
errorresponse.
- Check the application status by passing the card application ID into the
fetchCardApplicationStatusmethod:
AptoPlatform.defaultManager().fetchCardApplicationStatus(cardApplication.id) { result in
  switch result {
  case .failure(let error):
    // Do something with the error
  case .success(let updatedCardApplication):
    // Check the next step. After the disclaimer the result should be ISSUE_CARD
    if (updatedCardApplication.nextAction is WorkflowActionType.ISSUE_CARD) {
      // Issue the card
    }
  }
}
- When the method succeeds, check the application's
nextActionproperty. The value should beISSUE_CARDto indicate the application is approved so you may issue a card to the user. - When the method fails, error handling can be included within the
errorresponse.
Issue the Card
To issue a card to the user, pass in the card's approved application ID into the issueCard method.
Note: This method also accepts as the following optional parameters:
cardMetadata- String that will be stored with the card data.design- AnIssueCardDesigncontaining information about the design (Blue or Orange Programs only).
AptoPlatform.defaultManager().issueCard(cardApplication.id) { result in
  switch result {
  case .failure(let error):
    // Do something with the error
  case .success(let card):
    // card has been issued
  }
}
- When the method succeeds, the card has been issued.
- When the method fails, error handling can be included within the
errorresponse.
Order a Physical Card
Registered cardholders can order a physical card matching the same PAN as their virtual card. Once ordered, the card will be sent by postal mail to their registered address.
A cardholder should:
- Have an existing virtual card. A physical card can only be ordered if the user already has an existing virtual card.
- Be aware of potential costs when ordering a new physical card.
- Have enough funds to purchase a card (if there is a cost) prior to proceeding with the order request.
Ensure you validate this information prior to issuing a physical card request.
Get Program Configuration for Physical Card
Depending on your program configuration, there may be a cost associated with ordering a physical card.
Depending on the program, the card configuration may have the "digital with optional physical" configuration. This configuration enables the cardholder to issue a digital card during the onboarding process. Afterwards, the user can choose to order a physical card.
To check if the physical card requires a fee, use the getOrderPhysicalCardConfig method to retrieve the configuration details:
AptoPlatform.defaultManager().getOrderPhysicalCardConfig(cardId) { result in
  switch result {
  case .failure(let error):
    // Do something with the error
  case .success(let cardConfig):
    // Operation successful
  }
}
- When the method succeeds, an
PhysicalCardConfigobject is returned containing information about the card configuration for the physical card ordering process.issuanceFeerefers to the amount the user will have to pay for the physical card.userAddressis the address where the physical card will be shipped.
- When the method fails, error handling can be included within the
errorresponse.
Submit a Physical Card Order
To order a physical card, pass the card accountID into the orderPhysicalCard method:
AptoPlatform.defaultManager().orderPhysicalCard(cardId) { result in
  switch result {
  case .failure(let error):
    // Do something with the error
  case .success(let card):
    // Operation successful
  }
}
- When the method succeeds, a
cardobject is returned containing information about the status of the order in theorderedStatusproperty, which can be one of the following values:notApplicable,available,ordered,received. - When the method fails, error handling can be included within the
errorresponse.
Activate a Physical Card
Physical cards need to be activated using the provided activation code sent to the cardholder.
For the Green Program, physical cards are shipped to user in a card carrier envelope. This carrier contains:
- The physical card
- The card’s Activation Code
- The issuing statement and the name of your program.
For more information about physical cards, see the Apto Developer Guides.
To activate a physical card, use the activatePhysicalCard method and pass in the card's account ID accountID and the user's Activation Code PHYSICAL_CARD_ACTIVATION_CODE as a string:
AptoPlatform.defaultManager().activatePhysicalCard(cardId: accountID, code: PHYSICAL_CARD_ACTIVATION_CODE) { result in
  switch result {
  case .failure(let error):
    // Do something with the error
  case .success(let result):
    // Result contains information about the activation process and, if it failed, the reason why it failed.
  }
}
- When the method succeeds, a
resultobject is returned containing information about the activation process. - When the method fails, an
errorobject will contain the reason for the failure. Error handling can be included within theerrorresponse. Reasons for failure may include: internet connection issues, inoperable API, bad code, etc.
View Card Transactions and Spending
The SDK provides methods to:
View Card Transactions
To retrieve a list of transactions, pass the following into the fetchCardTransactions method:
accountId- The card'saccountIdpropertyfilters- ATransactionListFiltersobject, that filters the transactions by page, row, date, mcc, type, etc. For more information about the parameters for this object, see the Mobile APIforceRefresh- Boolean value indicating if transactions should be retrieved from the Apto Mobile API or the local cached transaction list. If set totrue, transactions are retrieved from the Apto Mobile API.
AptoPlatform.defaultManager().fetchCardTransactions(accountId, filters: filters, forceRefresh: false) { [weak self] result in
  switch result {
  case .failure(let error):
    // Do something with the error
  case .success(let transactions):
    // Operation successful
  }
}
- When the method succeeds, a
transactionsobject is returned containing a list ofTransactionobjects. - When the method fails, error handling can be included within the
errorresponse.
View Monthly Spending Stats
The SDK enables you to view the monthly spending for cards, classified by category.
To retrieve information about the monthly spending for a card, use the cardMonthlySpending method with the following parameters:
- Card's
accountIdproperty Dateobject specifying (at minimum) the- Spending month
- Spending year
Note: The results will include the spending for the month specified in the Date object. For example, a result with a date of January 15, 2021 will include the results for the entire month of January 2021.
AptoPlatform.defaultManager().cardMonthlySpending(card.accountId, date: Date()) { result in
  switch result {
  case .failure(let error):
    // Do something with the error
  case .success(let monthlySpending):
    // monthlySpending contains the stats of the given month; spendings classified by transaction category and difference with the previous month.
  }
}
- When the method succeeds, a
monthlySpendingobject is returned containing the stats for the provided month. The spending is classified by transaction category, and difference from the previous month. - When the method fails, error handling can be included within the
errorresponse.
Manage Card Payment Sources / Load Funds
Funds loaded onto a user's card are automatically deducted from the payment source. The balance is maintained on the user's card, managed by Apto Payments. You can load money onto a user's card using a valid debit card.
- Sandbox Cards for Testing
- Get Payment Sources
- Add a Payment Source
- Delete a Payment Source
- Add Funds to a Card
Sandbox Cards for Testing
We've provided a list of cards that can be used to test adding card funds within the sandbox environment:
| Card Type | Card Number |
|---|---|
| Visa | 4111111111111111 |
| Visa | 400000076000002 |
| Mastercard | 5200828282828210 |
| Mastercard | 2223000048400011 |
For all test cards:
- Any expiration date set to a future date may be used.
- Any CVV value may be used.
- Any 5-digit postal code value may be used.
Get Payment Sources
A list of payment sources can be retrieved using the getPaymentSources method. The method accepts three optional parameters:
| Parameter | Type | Description |
|---|---|---|
limit | Int | This value specifies the upper limit of the number of payment sources returned per call. The maximum value for this parameter is 50. |
startingAfter | String | If this value is set, only payment source ID's larger than this value are returned. |
endingBefore | String | If this value is set, only payment source ID's less than this value are returned. |
Note: The startingAfter and endingBefore parameters are mutually exclusive. Only one of these parameters may be present per call. If both parameters are set, an error will be thrown.
let limit = 10
let startingAfter = "id_123"
let endingBefore = "id_456"

let pagination = PaginationQuery.init(limit: limit, startingAfter: startingAfter, endingBefore: endingBefore)

AptoPlatform.defaultManager().getPaymentSources(request: pagination) { result in
  switch result {
  case .failure(let error):
    // Do something with the error
  case .success(let paymentSources):
    // paymentSources is a list of PaymentSource objects.
  }
}
- When the method succeeds, a
paymentSourcesobject is returned containing a list ofPaymentSourceobjects. - When the method fails, error handling can be included within the
errorresponse.
Add a Payment Source
To add a payment source:
Create a
PaymentSourceRequestobject:Note: Currently only cards are accepted.
val paymentSource = PaymentSourceCardRequest(
    pan: "4111111111111111",
    cvv: "123",
    expirationDate = "12/22",
    zipCode = "12345"
)
Pass
paymentSourceinto theaddPaymentSourcemethod:Note: Added payment sources are automatically marked as
preferredand will be set as the new default payment source.
AptoPlatform.defaultManager().(with: paymentSource) { result in
  switch result {
  case .failure(let error):
    // Do something with the error
  case .success(let paymentSource):
    // paymentSource is a PaymentSource object.
  }
}
- When the method succeeds, the added
PaymentSourceobject is returned without the PII (Personal Identifiable Information). - When the method fails, error handling can be included within the
errorresponse.
Delete a Payment Source
To delete a payment source, pass the payment source ID into the deletePaymentSource method:
Note: A preferred payment source can not be deleted.
AptoPlatform.defaultManager().deletePaymentSource(paymentSourceId: paymentSourceId) { result in
   switch result {
   case .failure(let error):
     // Do something with the error
   case .success:
     // No result
   }
}
- When the method succeeds, no response will be returned.
- When the method fails, error handling can be included within the
errorresponse.
Add Funds to a Card
To add funds to a card, pass the following parameters into the pushFunds method:
| Parameter | Type | Description |
|---|---|---|
balanceId | String | ID of the card's funding source you want to fund. See Get a Card's Default Funding Source to retrieve the balance ID property. |
paymentSourceId | String | ID of the Payment Source that will be used to add funds. |
amount | Money | Amount and currency that will be added to the balance. Note: The amount parameter of this object must use the Double format. |
val paymentSourceId = "payment_source_XXXXXXXXX"
val balanceId = "bal_XXXXXXXXX"
val amount = Amount(100.00, "USD")

let pushFundsRequest = PushFundsRequest(paymentSourceId: paymentSourceId, balanceId: balanceId, amount: amount)

AptoPlatform.defaultManager().pushFunds(with: pushFundsRequest) { result in
  switch result {
  case .failure(let error):
    // Do something with the error
  case .success(let paymentResult):
    // paymentResult is a PaymentResult object.
  }
}
- When the method succeeds, a
Paymentobject is returned with the completed payment information. - When the method fails, error handling can be included within the
errorresponse.
Manage Card Funding Sources for On-demand Debits (Blue or Orange Programs only)
Funding sources may be used for on-demand debiting. When a user spends using their card, the amount can be debited from a specified funding source, rather than using the funds loaded onto their card. A card can have more than one funding source.
Note: Only Blue or Orange Programs may use this feature to connect a funding source to a card. Green Program may only load funds onto a card.
The Mobile SDK enables you to:
- Get a Card's Default Funding Source
- List a Card's Available Funding Sources
- Connect a Funding Source to a Card
Get a Card's Default Funding Source
To retrieve a card's default funding source, pass the following parameters into the fetchCardFundingSource method.
accountID- The card's account IDforceRefresh- Boolean value indicating if transactions should be retrieved from the Apto Mobile API or the local cached transaction list. If set totrue, transactions are retrieved from the Apto Mobile API.
Note: If no default funding source is specified, the first available funding source will be used as the default funding source.
AptoPlatform.defaultManager().fetchCardFundingSource(cardId: accountId, forceRefresh: false) { result in
  switch result {
  case .failure(let error):
    // Do something with the error
  case .success(let fundingSource):
    // fundingSource is a FundingSource object.
  }
}
- When the method succeeds, a
FundingSourceobject is returned containing information about the funding source. - When the method fails, error handling can be included within the
errorresponse.
List a Card's Available Funding Sources
Apto cards may have multiple funding sources. To retrieve a list of available funding sources for a card, use the fetchCardFundingSources method. Ensure you pass in the following:
accountId: TheaccountIdof theCardobject for the funding source retrieval.page: Page number of the results to retrieve.rows: Number of rows to return in the result.forceRefresh- A boolean value indicating if transactions should be retrieved from the Apto Mobile API or the local cached transaction list. If set totrue, transactions are retrieved from the Apto Mobile API.
AptoPlatform.defaultManager().fetchCardFundingSources(accountId, page: 0, rows: 10, forceRefresh: false) { result in
  switch result {
  case .failure(let error):
    // Do something with the error
  case .success(let fundingSources):
    // fundingSources contain a list of FundingSource objects.
  }
}
- When the method succeeds, a
fundingSourcesobject is returned containing a list ofFundingSourceobjects. - When the method fails, error handling can be included within the
errorresponse.
Connect a Funding Source to a Card
Blue or Orange Programs can issue cards connected to a funding source not controlled by Apto Payments. Therefore, only Blue or Orange Programs can manage funding sources.
For example, when using the Coinbase card program, users connect their Coinbase wallet and select whether the card is Bitcoin or Ethereum using these funding source management methods.
To connect a funding source to a card, pass the card accountID and funding source id into the setCardFundingSource method:
AptoPlatform.defaultManager().setCardFundingSource(fundingSourceId, cardId: accountId) { result in
  switch result {
  case .failure(let error):
    // Do something with the error
  case .success(let fundingSource):
    // Operation successful
  }
}
- When the method succeeds, a
fundingSourceobject is returned containing information for the funding source. - When the method fails, error handling can be included within the
errorresponse.
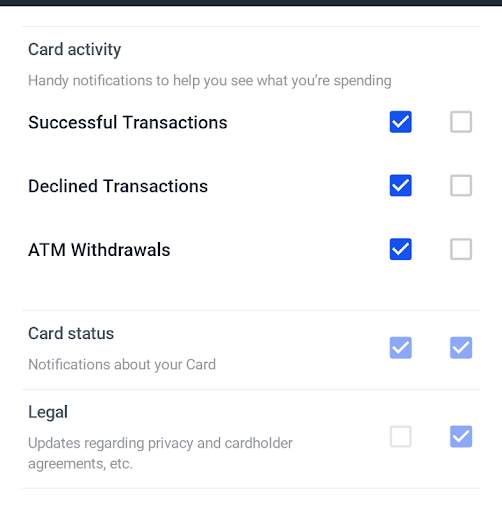
Set Notification Preferences
Push notifications for users are available for several events (transactions, card status changes, etc.). The SDK can enable the users to decide how they receive some of these notifications.
This section demonstrates how to:
Get Notification Preferences
To retrieve the current user's notification preferences, use the fetchNotificationPreferences method.
AptoPlatform.defaultManager().fetchNotificationPreferences() { result in
  switch result {
  case .failure(let error):
    // Do something with the error
  case .success(let notificationPreferences):
    // notificationPreferences contains all the information regarding the current user preferences.
  }
}
- When the method succeeds, a
NotificationPreferencesobject is returned containing the information for current user's notification preferences. Itspreferencesproperty contains a list ofNotificationGroupobjects, containing details for each notification. - When the method fails, error handling can be included within the
errorresponse.
Update Notification Preferences
To update the current user's notification preferences:
- Create a
NotificationPreferencesobject.
let existingNotificationGroup = notificationPreferences.preferences.first
let notificationGroup = NotificationGroup(groupId: existingNotificationGroup!.groupId, category: existingNotificationGroup!.category, state: NotificationGroup.State.disabled, channel: existingNotificationGroup!.channel)
let preferences = NotificationPreferences(preferences: [notificationGroup])
- Pass the preferences object into the
updateNotificationPreferencesmethod.
// Set the user preferences in `preferences`
AptoPlatform.defaultManager().updateNotificationPreferences(preferences) { result in
  switch result {
  case .failure(let error):
    // Do something with the error
  case .success(let updatedNotificationPreferences):
    // Operation successful
  }
}
- When the method succeeds, an
updatedNotificationPreferencesobject is returned containing the information for current user's notification preferences. - When the method fails, error handling can be included within the
errorresponse.
In-App Provisioning
In-app provisioning lets a user provision their card to their Apple Wallet allowing an easier adoption of your card program. To do In-App provisioning the card data needs to be tokenized and secured with special keys to be safe to send it over the internet.
For more details, refer to In-App Provisioning.
P2P Payments
P2P payments are transactions between users of the same card program with many use cases like splitting a dinner bill between friends. The process to send money to another users is divided in two:
Find the recipient
To retrieve a recipient, pass the following parameters into the p2pFindRecipient method:
- (Optional)
phone- This is the recipient phone number. - (Optional)
email- This is the email address.
Note: Include only the primary credential of your card program.
AptoPlatform.defaultManager().p2pFindRecipient(phone: phone, email: email) { result in
  switch result {
  case .failure(let error):
    // Do something with the error
  case .success(let transferRecipientResult):
    // transferRecipientResult is a TransferRecipientResult object.
  }
}
- When the method succeeds, a
TransferRecipientResultobject is returned containing information about the recipient. - When the method fails, error handling can be included within the
errorresponse.
Make the transfer
To complete the transfer you must:
1- Create an amount object
let amount = Amount(100.00, "USD")
2- Create a P2PTransferRequest object
let transferRequest = P2PTransferRequest(sourceId: sourceId, recipientId: cardholderId, amount: amount)
Note: The cardholderId should be obtained from Find the recipient
3- Pass the transferRequest object into the p2pMakeTransfer method make the transfer:
AptoPlatform.defaultManager().p2pMakeTransfer(transferRequest) { result in
  switch result {
  case .failure(let error):
    // Do something with the error
  case .success(let trasnferResponse):
    // P2P transfer successful
  }
}
- When the method succeeds, an
P2PTransferResultobject is returned. - When the method fails, error handling can be included within the
errorresponse.
Contributing & Development
We look forward to receiving your feedback, including new feature requests, bug fixes and documentation improvements.
If you would like to help:
- Refer to the issues section of the repository first, to ensure your feature or bug doesn't already exist (the request may be ongoing, or a newly-finished task).
- If your request is not in the issues section, please feel free to create one. We'll get back to you as soon as possible.
If you want to help improve the SDK by adding a new feature or bug fix, we'd be happy to receive pull requests